DIY Weightlifting Platforms: Getting Shredded at Home
Weightlifting platforms are an essential piece of equipment for anyone looking to build strength and power. They provide a stable surface for heavy lifts and protect flooring from damage.
There’s a common misconception that a DIY lifting platform is too complex to build, when, in reality, building a weightlifting platform tailored to your specific needs isn’t as hard as you may think.
How to Build a DIY Weightlifting Platform
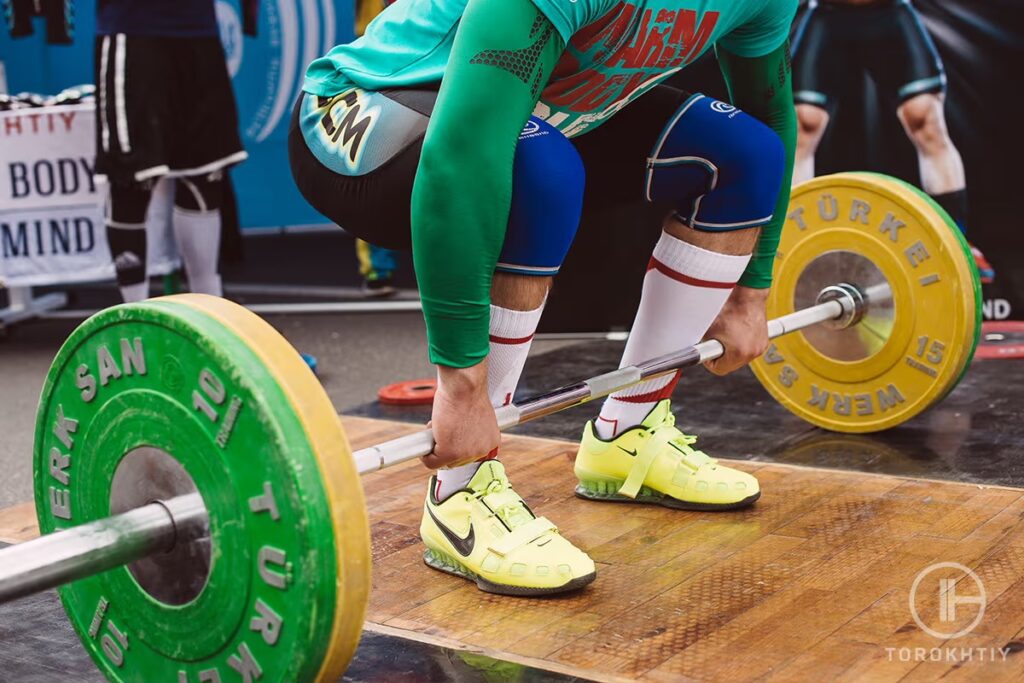
A DIY weightlifting platform is a piece of home gym equipment that you can make yourself using some basic materials. DIY lifting platforms are a great addition to a home gym, and allow you to perform lifting exercises without damaging your floors.
They can also provide a stable surface to lift on, which can improve your lifting form and increase your confidence in your lifts. Building your own weightlifting platform is a cost-effective way to improve your home gym setup and take your lifting to the next level.
With this easy-to-follow guide, you’ll be able to create a durable and sturdy home gym platform that can handle heavy weights and intense workouts, aiding you in smashing your fitness goals.
Supplies and Tools You Need to Build a Lifting Platform
1. Plywood Sheets
Plywood sheets are a crucial component of any weightlifting platform. They provide the necessary stability and support to handle heavy loads without damaging the floor. The most common thickness for the plywood sheets used for lifting platforms is around ¾ inch. Two sheets of plywood are usually needed, measuring 4×8 feet. However, the size can be adjusted based on your needs.
2. Stall Mats
Stall mats are durable, non-slip, and shock-absorbent, making them the perfect surface for a garage lifting platform. Much like plywood, a thickness of around ¾ inch is ideal.
3. Screws
The screws are used to attach the plywood sheets to the framing underneath. The recommended size for the wood screws is 3 inches, with coated screws preferred to reduce the risk of rust.
4. Wood Glue
Wood glue is used to bind the plywood together, providing additional stability. Water-resistant glue is best since it is more durable and provides a stronger bond.
4. Circular Saw
A circular saw is essential for cutting plywood sheets to the required size. A guide or straight edge can be used to ensure a straight cut, and it’s important to use a blade with the correct number of teeth for the thickness of the plywood being used.
5. Drill
A drill is required to create pilot holes in the plywood sheets and framing to make screwing the sheets in place easier. A cordless drill is best for ease of movement around the platform.
6. Jigsaw
A jigsaw is used to cut the stall mats to the correct size. A fine-toothed blade is preferred for a cleaner cut.
7. Measuring Tape
A measuring tape is essential for ensuring that the plywood sheets and stall mats are cut to the correct size.
8. Framing Lumber
Framing lumber is used to construct the frame below the platform. The frame provides support and helps to distribute the weight of the load evenly. The length of the lumber depends on the size of the platform, though as a rule of thumb, the recommended size is 2×4 inches. A standard weightlifting platform requires three pieces of 2×4 inch lumber, each measuring 8 feet in length.
How to Build a Weightlifting Platform
Building a weightlifting platform is a project that can be completed with just a few tools and supplies. Be that a DIY olympic lifting platform, squat rack, or anything in between, these step-by-step instructions will outline how to build your own weightlifting platform at home.
Step 1: Gather Your Supplies and Tools
Before you start building, make sure you have all the supplies and tools you need. For a standard lifting platform this will include:
- Two sheets of ¾ inch plywood
- Two ¾ stall mats
- Wood screws
- Wood glue
- Paint (optional)
- Circular saw
- Drill
- Measuring tape
- Clamps
- Pencil
- Paintbrush (if painting)
Step 2: Cut the Plywood Sheets
Using a circular saw, cut the two sheets of plywood to 4×8 inches and set aside.
Step 3: Glue the Plywood Sheets Together
Apply wood glue to the edges and place the sheets together. Clamp to hold in place until the glue dries.
Step 4: Attach the Stall Mats
While the glue is drying, place the stall mats on top of the plywood. Cut the mats to fit if there are any discrepancies. Once in place, drill pilot holes through the mats and the plywood.
Step 5: Screw the Plywood and Stall Mats Together
Using wood screws, attach the plywood and stall mats together. The recommended size for the screws is 3 inches. Make sure to use coated screws to prevent rust.
Step 6: Paint (Optional)
A good way to personalize your weightlifting platform is to paint it. Just make sure you let it dry completely before hitting your first set!
Step 7: Place the Platform in Your Desired Location
Once the platform is complete, move it to your desired location, making sure it’s level and stable before using it.
Step 8: Get Lifting
Congratulations! You’ve now built your own weightlifting platform. Remember to always follow proper technique and use appropriate safety equipment when lifting. Consult with a personal trainer or fitness professional if you are new to weightlifting or have any questions about proper form or technique.
But What If You Want to Buy a Weightlifting Platform?
I get it. Building a lifting platform at home can be a complex and time-consuming task. Maybe you’re not handy; or maybe you don’t have the time. Luckily, there are pre-built platforms available, and while they may not provide the customization and originality noted above, they’re a great alternative for a solid, industry approved piece of gym equipment.
Our Recommended Weightlifting Platform – Rogue Deadlift Platform
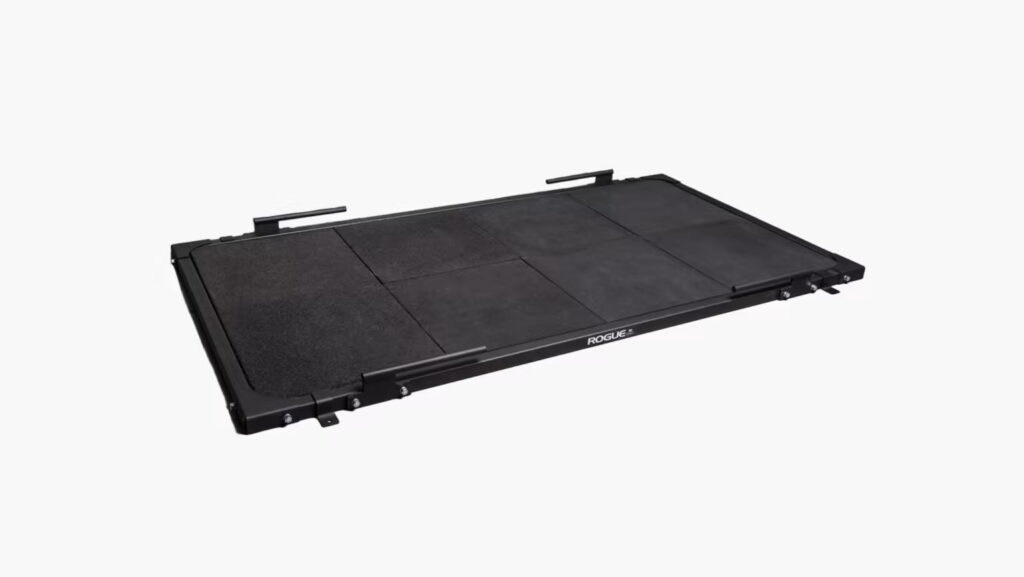
The is a top-of-the-line home weightlifting platform that is designed to make deadlift training more efficient and effective. This platform is made with high-quality materials and is built to withstand heavy use over time. It features a rubber mat that provides excellent traction and helps to reduce noise and vibration, while the wooden center platform offers a stable and secure surface for lifting.
One of the standout features of this platform is its modular design. The center platform is removable, allowing you to adjust the height and position of the barbell to suit your needs. This makes it a versatile platform that can be used for a variety of different lifts, including deadlifts, cleans, and snatches. The platform is also compact and easy to store when not in use, making it a great choice for those with limited space.
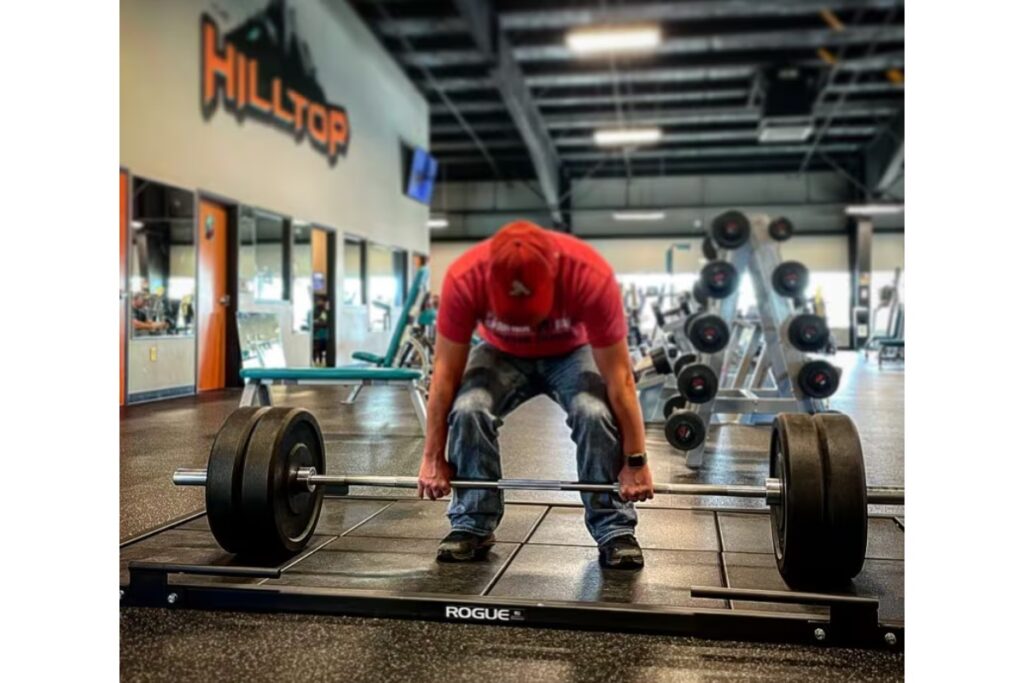
The Rogue Deadlift Platform is an excellent investment for anyone looking to improve their home weightlifting setup. The high-quality materials, sturdy construction, and modular design make it a versatile and durable platform that is built to last. While it may be more expensive than a diy weightlifting platform, its quality and durability make it well worth the investment for serious lifters.
FAQ
What Should Weightlifting Platforms Be Made Of?
A weightlifting platform should be made of high-quality, durable materials that can withstand heavy use and support heavy weights. This typically includes materials such as rubber, wood, and steel. Platforms like the Rogue Deadlift Platform are a low-stress alternative to DIY lifting platforms, and tick all the boxes.
What Kind of Wood Is Used for Weightlifting Platforms?
The kind of wood used for weightlifting platforms is typically hardwoods such as maple, oak, or birch. These woods are strong, durable, and can withstand heavy use and impacts over time. This is even more important with a DIY power rack platform or olympic platform.
How Thick Should a Lifting Platform Be?
The thickness of a weightlifting platform can vary depending on the specific design and purpose of the platform. Generally, a weightlifting platform should be at least 2 inches thick to provide a stable and secure surface for lifting. However, some platforms may be thicker in order to provide additional shock absorption or noise reduction, especially for garage lifting platforms.
Conclusion
Building a DIY weightlifting platform can be a cost-effective and rewarding way to enhance your home gym setup. With the right materials and instructions, you can create a safe platform for heavy lifting that will protect your floors and improve your form.
Whether you’re a beginner or an experienced lifter, the benefits of having your own platform are undeniable. Not only does it provide a sturdy surface for heavy lifting, but it can also add an aesthetic appeal to your workout space.
I hope the steps outlined above on how to build weightlifting platforms are useful, and if followed properly, will help you create a durable and functional platform that will serve you well for years to come. But for those looking for a high-quality, low-stress alternative, The Rogue Deadlift platform ticks all the boxes with the added element of being durable, storable and convenient.
I hope that this article has been informative and helpful in your quest to build your own DIY squat platform. We believe that building your own platform can be a great way to take your home gym to the next level and improve your overall lifting experience.
But we also know that there is always room for discussion and exchange of ideas, and we want to hear from you! Do you have any tips or tricks that you’d like to share with the community about building weightlifting platforms? Have you built your own platform and want to share your experience?
If so, we encourage you to use the comment section below to share your thoughts and engage in a conversation with other readers. Our comment section is a space where we can all learn from each other and support each other on our fitness journeys.
So go ahead and share your thoughts, questions, and insights in the comments section below. We can’t wait to hear from you!
Also read:
References:
- Weightlifting Platforms: What Are They and Do You Need One? // YourWorkoutBook: https://www.yourworkoutbook.com/weightlifting-platforms/
- How to Build a Weightlifting Platform // Catalyst Athletics: https://www.catalystathletics.com/article/1895/How-to-Build-a-Weightlifting-Platform/
- Hardwood // Wikipedia: https://en.wikipedia.org/wiki/Hardwood
- Tips for Dampening Loud Noise in Your Home Gym // Ironmaster: https://www.ironmaster.com/blog/tips-for-dampening-loud-noise-in-your-home-gym/
Why Trust Us?
With over 20 years in Olympic Weightlifting, our team does its best to provide the audience with ultimate support and meet the needs and requirements of advanced athletes and professional lifters, as well as people who strive to open new opportunities and develop their physical capabilities with us.
By trusting the recommendations of our certified experts in coaching, nutrition, dietology, and sports training programming, as well as scientific consultants, and physiotherapists, we provide you with thorough, well-considered, and scientifically proven content. All the information given in the articles concerning workout programming, separate exercises, and athletic performance, in general, is based on verified data. We ensure that you can rely on our professionals’ pieces of advice and recommendations that can be treated as personalized ones which will benefit you and fully meet your needs.
The product testing process is described in more detail here
Author: Ihor Shymechko
Pro Olympic Weightlifter, Coach
Best Results: Snatch – 208 kg,
C&J – 240 kg
Ihor has been a professional weightlifter since 1996, boasting over two decades of competition experience. His notable achievements include clinching the European Championship in 2009 and securing a silver medal in the 105kg division at the Senior World Championships in 2011. Ihor represented his country in the 2008, 2012, and 2016 Summer Olympics. After retiring from competitive weightlifting, he transitioned to coaching, leveraging his vast experience to guide athletes who now compete on both national and international stages.

